Showing posts with label DIY. Show all posts

Monday, November 12, 2012

How to Make an Upholstered Headboard with Nailhead Trim


So IF you wanted to make a headboard like ours you will need:

Materials:
  • Plywood to the size that you needed (ours was 48"H x 80"W for a Extra Tall headboard for a king size mattress. )
  • Tacking Strip- we used four rolls of Deitz home for our project.
  • 2" Heavy Duty Foam for the center of your headboard
  • 1" Heavy Duty Foam for the border of your headboard. Ours was 4" Wide all the way around.
  • Adhesive spray that sticks foam to wood. We used 3M #77
  • Batting to cover and smooth your foam. We used Warm and Natural- it was perfect!
  • Fabric to the size needed. We bought 3 yards because we intended to make legs. We ended up not making legs and could have used 2.5 yards. 
  • Nailheads-- we used brushed nickel 3/16" nailheads from here. We opted not to use the trim kits because they didn't look as nice-- but are in hindsight, probably MUCH easier!
  • Staples
  • Wall Anchor Brackets

Tools:
  • T-Square for measuring. Not necessary- but VERY helpful when measuring the foam and plywood board.
  • Nailhead hammer
  • Nailhead spacer tool
  • Staple gun
  • Elmer's glue
  • Markers (for drawing on foam and board)
  • Push pins (to hold fabric in place)
  •  A second pair of hands

 How To Create Your Masterpiece.
Before any work begins- plan out your design on paper. Get an idea of materials that you need and come up with any problems you might encounter. If you use our design- we worked out all the kinks before we made ours and other than the fabric mishap- it went easy!


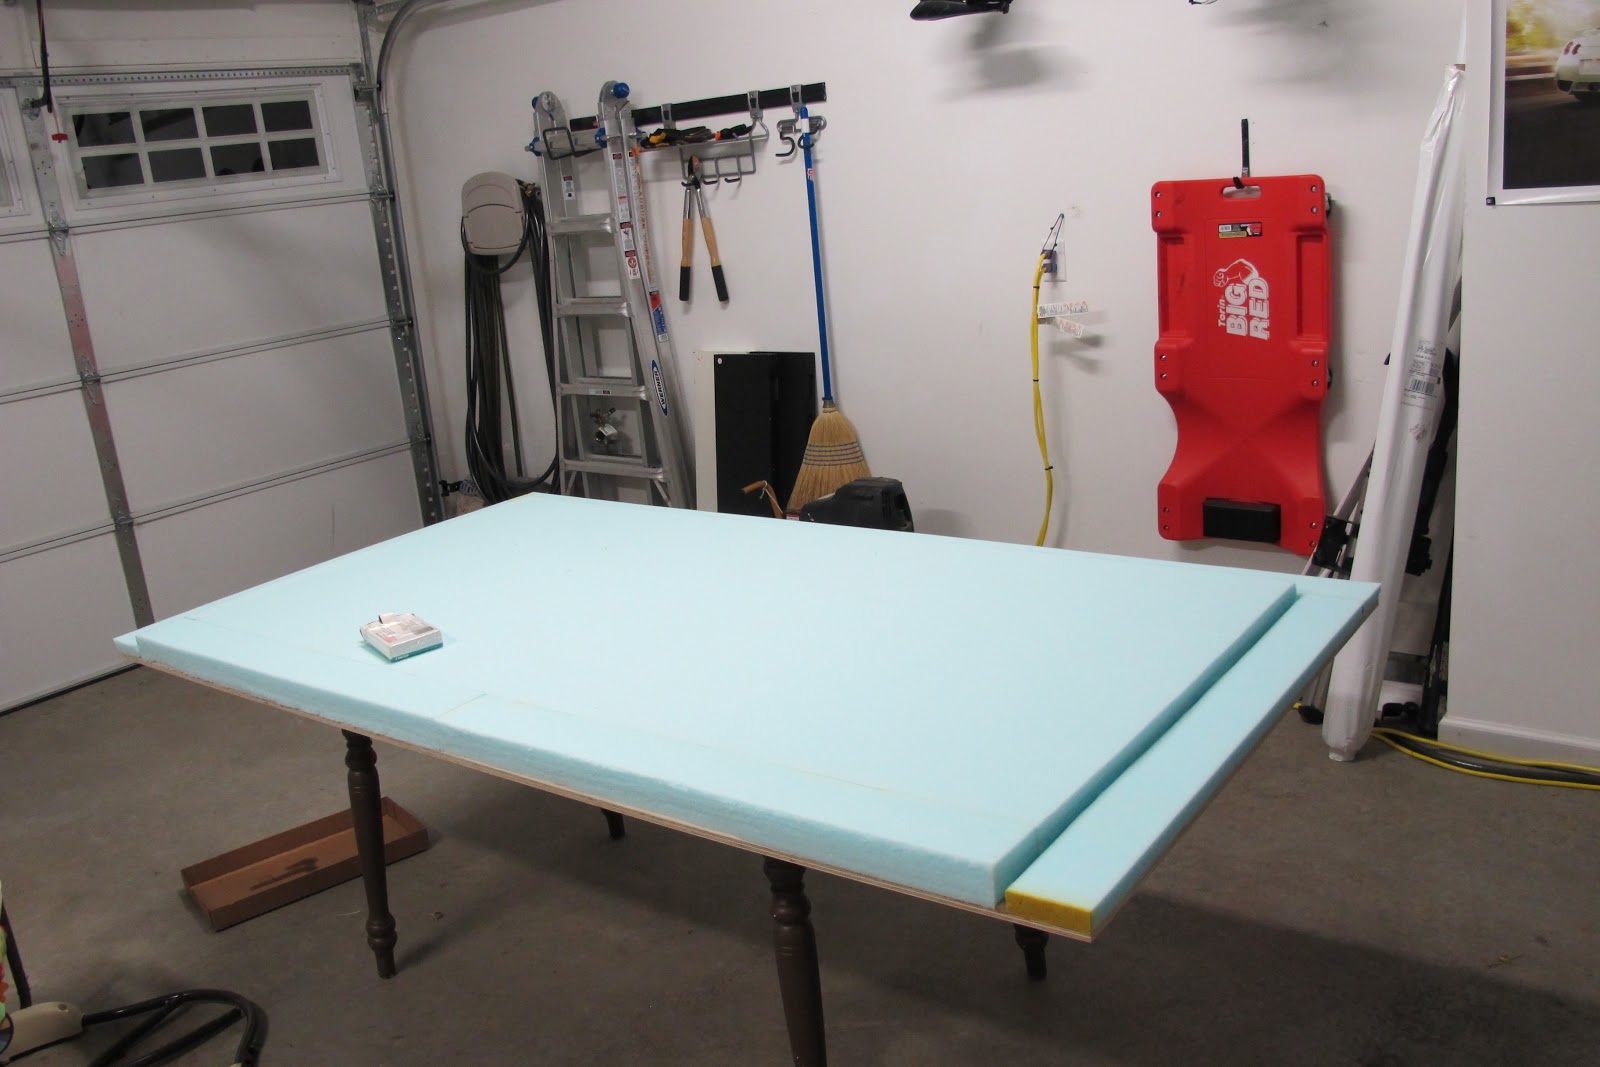
1. Draw out your design on the plywood and cut to size. We had a 4" border all the way around the headboard.
 2. Mark any notes to help you remember what goes where (I marked what was 2" and 1" Foam. I also labeled sides.
 

3. Cut strips of the tacking strips to go between the border and the center foam. Glue layers together until the desired thickness needed. This is used as a base for the nailheads. Make sure to make it thick enough so that the nailheads don't go all the way through the plywood. We used 14 layers for ours.
I marked each line and it's matching tack strip to help me not get confused!
Once all layers and strips are made, glue them to the plywood on their corresponding line.

4. Lay foam out and cut to needed size.We cut to the edge of the tack strip. In hindsight, if there was a little overlapping on the strip- I wouldn't think that was a bad thing.We cut the center first and then the border.
We always put manufactured edges out and up and our cut sides to the inside or bottom.  

5.Spray the plywood and the foam with the spray adhesive and let sit for a minute (as directed by the can) and then place foam on plywood and press down.
Make sure to get all the pieces of foam as close together as possible to avoid gaps and creasing!

6. Layout the batting across the headboard and smooth out-- the smoother this step goes- the smoother the fabric will lay. 

7. Use staple gun to attach batting to the tacking strip, pulling tightly to avoid sagging. This will also give you a channel for your nailheads to go. 
Go ahead and staple the batting to the back. Make sure to work the batting in the corner to get a clean edge.

8.Because the batting is holding the shape together and gives your fabric something to grip to, you can lay your fabric out and get it as straight as possible on the fabric.
Tuck the fabic into the channel that you have created with the tacking strip- don't staple this. If you need to, use small push pins to hold fabric in place. 
9.Wrap the fabric around the border and then staple on the back. I started at the corners and got them smooth and folded and then worked outwards. Make sure to pull the fabric consistently so that you don't get dips where you pulled too tight- but make sure that it is taught and won't sag over time. 

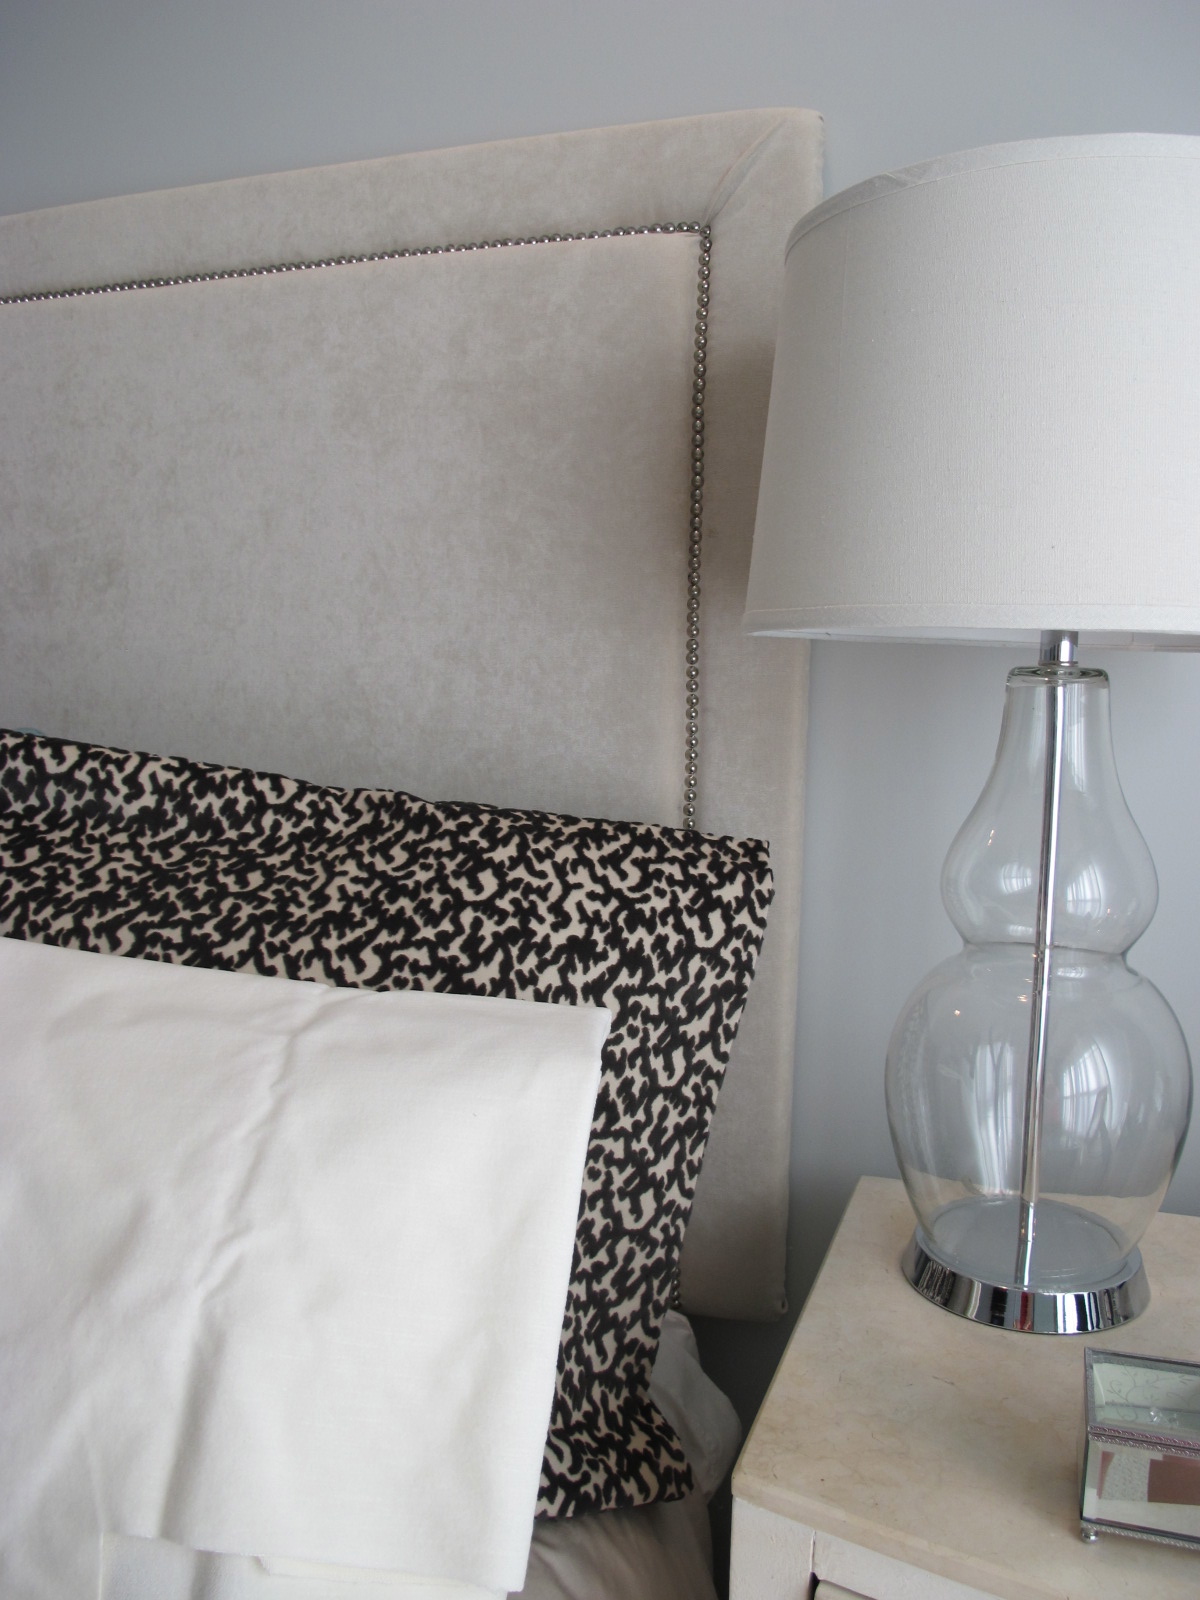
10.Using your nailhead spacer, begin in the corner and slowly take your time nailing in your nailheads down the sides and across the top. Because your channel is about twice the size of your nailhead, it is easy to center the nailheads. As long as your tack strip was straight, so will be your nailheads! 


11.You can cover the backs of the headboard- but we decided against it since we ended up just attaching the headboard to the wall as this one blogger did. 


Our original plan was to attach the headboard to the bed frame with legs, but after working through the process, we decided because of the height and weight of the headboard that it needed to be wall mounted.


12. We bought two 18" wall brackets for it. Greg found studs that he could screw into and then mounted the wall bracket.

He then located where these would hit on the back of the headboard and then screwed in the counterpart. (sorry, we didn't get pictures of this part! Here is a great diagram of what happened though!)

13.With and easy lift and sitting the headboard on the bracket, a bit of adjusting left and right- we were done!


Although a long and intense project it is so worth it!  I found a couple of companies to make this for me and was quoted $1500-2200 for just the headboard. We were able to make ours for just around $300. Well worth the save if you ask me!

Good luck with yours!


Monday, November 5, 2012

In Headboard Heaven!

After an almost 5 month hiatus, we got back to work on the headboard and finally finished it this week. 
Before I reveal the end results, let me give you a peek into the drama it took to get here.

Check out post # 1 From Headboard Heck
and Post #2 Into the Depths of Headboard Heck 
for the dumb drama that came along for the ride.

The End Results:
(P.S. Don't pay attention to the shorty nightstand on the left- it is getting replaced soon!)


Here is a detail of the border and the nailhead trim:
Although this picture makes the fabric look wavy- it isn't!

I love how it has turned out. It makes the room feel so much more complete. It also makes me want to change our bedding. The turquoise Euro's that I photographed are actually from my guest bedroom and are just to show how big the back pillows SHOULD be. Right now, I only have king size shams and need to make Euros to add some height to my bedding. 


I bought these velvet fabrics at Scott's in Atlanta a couple of years ago and have never used them. I'm so glad that I have waited- -I can't wait to make them and finish the bed up!


Not to bore you with the step by steps, I have posted another post that goes more into detail in case you want to make one yourself!

It was a fun project, even with the hang-ups, but it is so rewarding when it is finished and you are able to enjoy your hard work!


Thursday, October 18, 2012

Getting your dream home ... on a budget

Misty from The Family Math is a cousin of mine that lives in Tuscalooser, I mean Tuscaloosa :)  She has a wonderful husband Bobby, and the cutest son Noah.

She blogs about all different topics. She and Bobby have been updating their home, losing weight, talking about religion, and loving on their little Noah. So stop by and see what they are all about!

They recently built a fire pit and anyone thinking about making one is sure to be inspired!
___________________________________________________________________________________


I'm so excited and honored Whitney asked me to guest post on her site today. I'm a PR professional, a mom, a wife, a workout enthusiast, and I somehow also find time to blog regularly over at The Family Math.

My husband Bobby and I bought our house three years ago, and we are in the process of putting it together the way we want it -- on a very tight budget. We are working the Dave Ramsay plan, trying to save and pay off debt, and (at least at the moment) there's not a lot of extra cash to spend on house projects.

I'm sure some of you can relate.

Bobby enjoying the fruits
of his hard work!
At the same time, we don't want to completely put our dreams for our home on hold indefinitely, so we are having to be savvy about opportunities that arise: taking advantages of sales on RueLaLa and One Kings Lane, shopping at second-hand and salvage stores for specific items and using our local Freecycle and Craigslist to find deals.


One of the things Bobby has been itching for since we bought our home is a fire pit. You know about dudes and fire, right?

He's priced them, told me about nice ones he found on clearance in the off-season and all but begged, but we just hadn't been able to find the room for it in our budget. A few months ago, I found this tutorial for a homemade fire pit that I shared with him and pinned as possible inspiration for a future project, but, again, we were waiting for the right time to buy the supplies.

So when some friends of ours announced on Facebook that they had a huge pile of bricks to give away, I jumped on that immediately!

We were a little iffy about how it would work out at first, but Bobby, who is admittedly not one of those McGuyver-type guys who can build a helicopter out of a paper clip and a rubber band, was more than up to the task. It ended up being a really simple little project that just about anyone with the bricks and space could do.

The final product
Bobby set up one layer of bricks as a base for the fire pit. He then stacked a "layer" of bricks three-by-three around the edge of the square, breaking bricks with a hammer to fill odd spaces, before doing a couple of two-by-two layers. This method of staggering causes the whole structure to be more stable. Counting the base, the pit is four bricks high. To finish it off, he added a row of bricks all the way around the outside of the pit to be used as a foot rest.

Total cost of the project: FREE.

You really can't beat that. We debated whether we wanted to mortar the pit together, but as is, it's plenty stable for use (believe me, we've put it to the test!) but can also be moved and rebuilt quite easily.

If you are like us and on a tight budget, don't let that keep you from accomplishing what you want to in and around your home. Be creative and patient, and you may just end up with something better than what you even imagined to begin with!

______________________________________________________________________________________
Thanks Misty for showing us your mad fire skills!

Come back tomorrow and enjoy an afternoon under the covered porch!